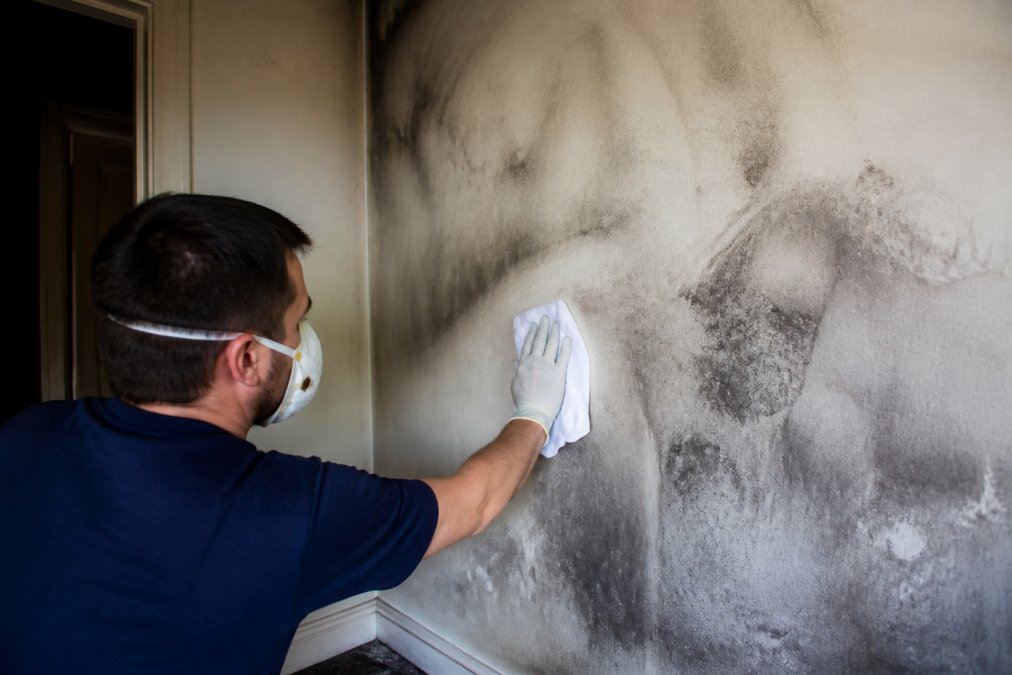
 how-to
Removing Smoke Smell From Walls: 7-Step Guide
Table of Contents
- Why Smoke Odor Lingers in Walls After a Fire
- What You'll Need Before You Start
- Step 1: Ventilate and Set Up Air Exchange
- Step 2: How to Clean Soot Off Walls Safely
- Step 3: Natural Options for Light Smoke Residue
- Step 4: Choosing the Best Odor Neutralizing Primer for Smoke
- Step 5: When to Call Professional Fire Damage Restoration
- Common Mistakes That Leave Smoke Smell Behind
- Frequently Asked Questions
Last Updated: September 13, 2026
Why Smoke Odor Lingers in Walls After a Fire
Removing smoke smell from walls is harder than wiping surfaces because the smoke smell from walls has bonded to the material. When smoke cools, it deposits tar and nicotine residue into the pores of drywall, plaster, and wood, which keeps releasing volatile organic compounds for months.
This guide walks through the seven steps used on fire and smoke damage restoration jobs.
Most guides get this wrong: they treat smoke odor as a surface problem. Porous surfaces like unpainted drywall, ceiling texture, and raw lumber absorb smoke tar like a sponge, so scrubbing removes the visible film but leaves the odor source trapped underneath.
The fix is methodical: ventilation, dry cleaning, wet cleaning, odor neutralization, and sealing primer, done in that order, remove the smell at the source. Skip a step and it comes back.
What You'll Need Before You Start
Safety equipment comes first. Smoke residue contains fine particulates that irritate lungs and skin, and cleaning solutions add their own hazards.
Gather this before you touch a wall:
- Respirator with P100 or N95-rated filters, not a dust mask
- Nitrile gloves and eye protection
- HEPA vacuum with a brush attachment
- Chemical sponges (dry-cleaning soot sponges)
- Bucket, microfiber cloths, and scrub brushes
- TSP or a heavy-duty degreaser, plus mild detergent for light jobs
- Vinegar and baking soda if you're avoiding harsh chemicals
- Fans, box fans, or a negative air machine for air exchange
- Stain-blocking or odor-neutralizing primer and painter's tape
Step 1: Ventilate and Set Up Air Exchange
Ventilation comes first because it removes airborne soot before it resettles on surfaces you just cleaned. Open windows and doors on opposite sides of the room for cross-flow, and place fans facing outward.
For heavier smoke, a negative air machine with a HEPA filter exhausts air outside, keeping soot out of clean rooms. Run ventilation at least 30 minutes before cleaning and keep it running throughout.
Activated charcoal filters capture odor molecules that HEPA filters miss, so a unit with both stages does more than a fan alone. Don't rely on a household air purifier as your only odor fix: it manages the air, not the walls.
Step 2: How to Clean Soot Off Walls Safely
Cleaning soot off walls safely means removing loose residue before it becomes a wet, smeared mess. Soot is oily, so wetting it too early grinds it deeper.
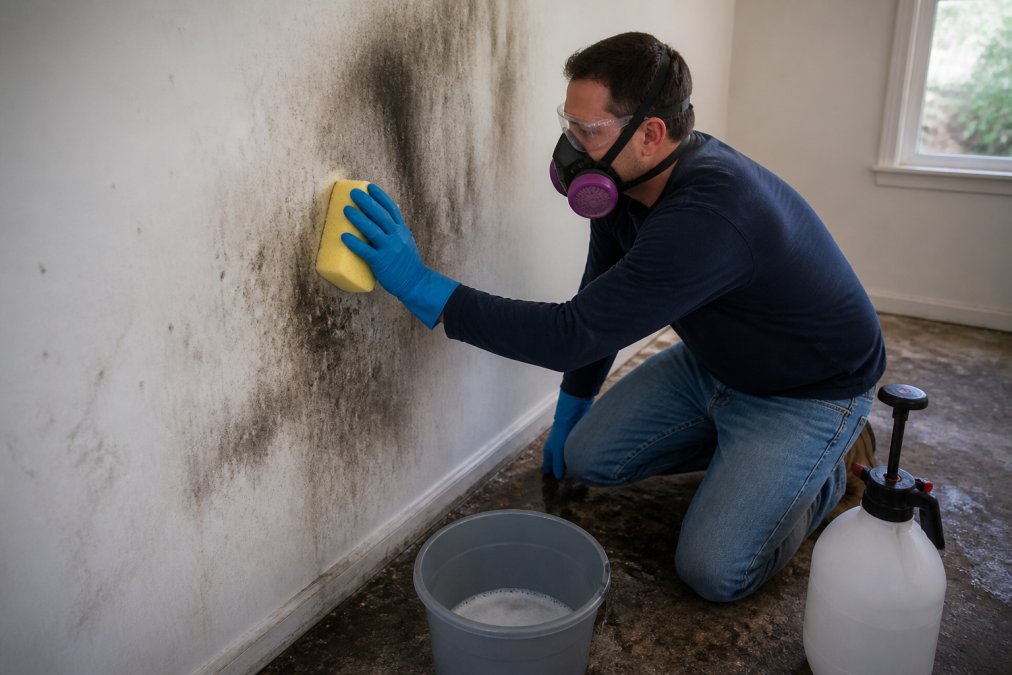
Dry-Cleaning First: Sponges and HEPA Vacuums
Start dry. Run a HEPA vacuum slowly across ceilings and upper walls, overlapping each pass, then wipe with a chemical sponge using light pressure and a clean face often. Dry cleaning lifts the bulk of the soot before liquid touches the wall.
Wet Cleaning: TSP, Degreasers, and Mild Detergent
For painted walls, work top to bottom with a mild detergent solution first. For stubborn smoke tar, switch to trisodium phosphate (TSP) mixed per the label, or a heavy-duty degreaser. Change rinse water often; dirty water just redistributes residue.
| Surface | Cleaning Method | Watch Out For |
|---|---|---|
| Painted drywall | Mild detergent, then TSP for heavy film | Over-wetting seams |
| Unpainted drywall | Dry clean only, then seal | Water causes crumbling |
| Wood trim | Degreaser, then wood-safe rinse | Raised grain from too much water |
| Brick and stone | TSP and stiff brush | Residue trapped in texture |
| Ceiling texture | HEPA vacuum and sponge only | Disintegration from wet scrubbing |
Step 3: Natural Options for Light Smoke Residue
Natural cleaners have a real but narrow role in smoke odor removal. They work on sealed, painted surfaces carrying light residue from a candle, cooking, or a small contained fire. They do not work on unpainted drywall, raw wood, or ceiling texture, where tar and nicotine have soaked past a surface wipe.
Knowing the boundary is the difference between a fix and a wasted afternoon.
Vinegar: What It Actually Does
White vinegar is a mild acid that dissolves the alkaline salts in light smoke film and evaporates cleanly, making it a common first pass on painted walls and trim. It does not neutralize tar or penetrate sealed paint to reach trapped odor.
A workable ratio for light residue:
- 1 part white vinegar to 1 part warm water for a general wipe-down on painted walls
- Full-strength vinegar on glossy surfaces and tile, where there is no risk of dulling the finish
- Dwell time of 1 to 2 minutes before wiping, so the acid has time to work on the film
- Rinse with clean water afterward, because dried vinegar leaves a sticky residue that attracts dust
Do not use vinegar on natural stone, unsealed grout, or aluminum. The acid etches or dulls those surfaces.
Baking Soda: Paste vs. Bowl
Baking soda works two ways, and conflating them is a mistake.
As a paste, mixed roughly 3 parts baking soda to 1 part water, it acts as a mild abrasive and odor absorber on hard, non-porous surfaces. Apply to stubborn spots on painted trim, tile, or sealed wood, let it sit 10 to 15 minutes, then wipe and rinse. It will not pull tar out of drywall.
As a dry bowl, left open in the room, baking soda absorbs airborne odor molecules. The effect is slow and limited: it manages the air, not the walls, so expect it to help with residual smell after cleaning, not replace cleaning.
Activated Charcoal and Coffee Grounds
Activated charcoal has far more surface area per gram than baking soda and is the better passive odor absorber. Set out several shallow trays in the closed room for 24 to 48 hours after cleaning and before priming. Fresh, dry coffee grounds work similarly.
Neither removes odor from the wall; they reduce what is in the air so you can judge whether the wall is still off-gassing.
When Natural Cleaning Stops Working
The signal is simple: if the smell returns within a day or two of a natural-cleaning pass, the residue has soaked past the surface. Two rounds with no improvement means the odor source is inside the substrate, so move to a stain-blocking primer. Continuing to clean just spreads the problem.
For households avoiding harsh chemicals, this is a legitimate first step, but treat it as triage, not a cure.
Step 4: Choosing the Best Odor Neutralizing Primer for Smoke
The best odor neutralizing primer for smoke is a shellac-based or oil-based stain-blocking primer, not standard latex paint. Shellac seals smoke tar and nicotine residue inside the film so odor can't off-gas.
Water-based primers let odor molecules migrate through over time, which is why smoke smell sometimes returns weeks after a repaint. Look for a primer labeled for fire and smoke damage, and apply it over every cleaned surface: walls, ceilings, trim, and subfloor edges.
Two coats are standard on heavy smoke. Follow the manufacturer's recoat window and ventilate while it cures, since shellac and oil primers carry strong fumes. Once sealed, topcoat with your finish paint; skip the primer and the odor bleeds through.
Step 5: When to Call Professional Fire Damage Restoration
Most guides tell you to call a pro when damage is "extensive" and leave it there. That is not a decision rule. The real question is whether the odor source is reachable with the tools in your garage. If it is not, no DIY cleaning will fix it.
The Reachability Test
Smoke travels the way air travels. If the fire burned long enough for the HVAC system to run, or for smoke to sit for more than a few hours, residue has moved into places a sponge cannot go:
- Inside wall cavities, behind the drywall you are cleaning
- Inside HVAC ducts and the air handler, which recirculate odor every time the system runs
- Inside insulation, which acts as a sponge and cannot be cleaned, only replaced
- Behind baseboards, outlet covers, and switch plates, where soot settles and stays
- In attic and crawlspace framing, which is often missed entirely
If any of those apply, DIY cleaning addresses the visible surface while the odor source keeps working. That is why smoke smell returns days or weeks after a thorough cleaning job.
DIY vs. Professional: A Cost-Benefit Frame
A useful frame is not "can I do this" but "what does the job require."
DIY makes sense when:
- The fire was small and contained to one room
- The HVAC system did not run during or after the fire
- The smell is fading with each cleaning pass, not returning
- Surfaces are painted and sealed, not raw or porous
- You have the safety gear and time to do it methodically
Professional remediation makes sense when:
- The smell returns within days of cleaning
- The fire touched structural framing, attic, or crawlspace
- The HVAC system ran during or after the fire
- You see soot behind outlets, baseboards, or switch plates
- The home has long-term nicotine residue from years of smoking
- You are filing an insurance claim and need documented scope and cause
What Professional Remediation Actually Involves
A professional remediation scope typically includes stages DIY cannot replicate:
- Moisture and air quality assessment to map where residue has traveled
- Containment to prevent cross-contamination into clean rooms
- HEPA vacuuming and dry sponge cleaning of all affected surfaces
- Chemical sponge and wet cleaning with professional-grade degreasers
- HVAC cleaning or component replacement, including ductwork and the air handler
- Removal and replacement of insulation, carpet, and padding that cannot be cleaned
- Odor neutralization using hydroxyl generators or, in some cases, ozone in an empty, sealed space
- Sealing and priming with shellac or oil-based stain-blocking primer
- Verification through air quality testing before the job is signed off
Steps 5 through 9 are the ones most homeowners cannot do themselves, and they determine whether the smell actually goes away.
Insurance: What to Expect
Most homeowner policies cover fire and smoke damage, including remediation, but the process has rules. Document everything before you clean: photograph the damage, keep receipts, and do not throw away damaged materials until the adjuster has seen them. Many policies also require you to mitigate further damage, so ventilation and basic cleanup are expected before the claim is filed.
A professional remediation company typically works directly with the adjuster, provides a scope of work, and handles documentation. That value matters on larger claims, where the difference between a covered and denied item often comes down to how the scope was written.
Questions to Ask Before You Hire
- Are your technicians certified in fire and smoke restoration?
- Will you provide a written scope of work and a post-remediation verification?
- Do you handle the insurance claim directly, or do I pay upfront and seek reimbursement?
- What is your policy on ozone and hydroxyl generators, and how do you verify the space is safe to reoccupy?
- Do you subcontract the HVAC cleaning, or is it in-house?
If a company cannot answer those clearly, keep looking. The difference between a good and bad remediation job shows up months later when the smell comes back.
For homes with significant damage, professional remediation can be the most effective path to a lasting result.
Common Mistakes That Leave Smoke Smell Behind
The most common mistake is painting over smoke-damaged walls without sealing first. Paint hides the stain, not the odor, and the smell returns within weeks.
Other repeat offenders:
- Wet-cleaning before dry-cleaning. You smear soot instead of removing it.
- Skipping the ceiling. Smoke rises, so ceilings usually carry the heaviest residue.
- Forgetting the HVAC system. Every time the air runs, trapped soot recirculates.
- Using a standard primer. Latex doesn't block odor molecules.
- Ignoring porous materials. Carpet, padding, and insulation often need replacement, not cleaning.
A quick verification step helps: after cleaning and before priming, close the room for a few hours and check for odor. If it's still noticeable, clean again, so you catch missed spots before sealing them in.
If you'd rather not gamble on a DIY job, FEMA's fire safety and recovery guidance and the EPA's indoor air quality resources both stress that smoke residue can affect indoor air long after the fire. For homes with significant damage, professional remediation is the safer route. the CDC's guidance on cleanup after a fire also recommends protective gear for anyone handling soot and chemical residue.
Frequently Asked Questions
What neutralizes the smell of smoke on interior walls?
No single product neutralizes smoke odor on its own. The smell comes from smoke tar and nicotine residue trapped in porous surfaces, so the fix is a sequence: ventilate the room, dry-clean soot with a HEPA vacuum, wash with an alkaline cleaner or trisodium phosphate, then seal the wall with a stain-blocking primer. Skipping the primer step is the most common reason odors return weeks later, even after a thorough scrubbing.
Will dish soap or vinegar remove nicotine residue from walls?
Dish soap and vinegar can lift light surface residue on painted drywall, and vinegar helps with mild odors. They will not pull nicotine or smoke tar out of porous surfaces like unfinished drywall, bare wood, or textured ceilings. For those, use an alkaline cleaner or TSP, then apply a sealing primer. Test any solution on a hidden spot first to check for paint damage.
Is it necessary to prime and repaint walls after smoke damage?
In most cases, yes. Cleaning removes surface residue, but smoke particles sit inside the pores of drywall and paint. A stain-blocking or odor-neutralizing primer encapsulates those particles so they cannot off-gas into the room. Standard paint alone will not block them. For heavy damage, a shellac-based primer is the most reliable option before repainting.
When should I hire a professional fire damage restoration company instead of doing it myself?
Call a professional when the fire involved structural materials, when odor persists after two cleaning attempts, or when smoke reached HVAC ducts, insulation, or crawl spaces. Professional restoration teams use specialized equipment and techniques. They also document damage for insurance claims, which matters if the loss exceeds your deductible.
Smoke odor that keeps returning usually means residue is trapped where cleaning can't reach. Disaster Services provides 24/7 emergency fire and smoke damage restoration, free visual inspections, and complete insurance claims assistance, backed by licensed and insured technicians. Get started with Disaster Services and get your home or business back to a safe, smoke-free environment.