 how-to
Emergency Water Extraction Services Houston: What to Do First
Table of Contents
- Why Every Hour Counts After Water Damage
- Step 1: Safety First Before Water Removal Begins
- Step 2: Document Everything for Your Insurance Claim
- Step 3: What Emergency Water Extraction Services Houston Actually Do
- The Water Damage Restoration Timeline: What to Expect
- Signs of Mold After Water Damage: When to Call for Remediation
- Common Mistakes to Avoid During Cleanup
- Why Choose Disaster Services for Restoration
- Frequently Asked Questions
Last Updated: September 9, 2026
Why Every Hour Counts After Water Damage
When water invades your home, the clock starts ticking immediately. Emergency water extraction services Houston homeowners call today are responding to a race against time: within 24 to 48 hours, moisture seeps into drywall, subflooring, and structural beams, creating the perfect environment for mold growth and compromising your property's integrity.
Water damage is progressive: a contained leak spreads through walls via capillary action, saturating insulation and weakening wood framing. Every hour of delay compounds the damage and the cost of restoration.
Your first move matters more than any equipment we bring. Before you call anyone, you need to protect yourself and preserve evidence.
Step 1: Safety First Before Water Removal Begins
The biggest mistake homeowners make is rushing into cleanup before securing the scene. A few minutes of caution prevents injuries that turn a water event into a medical emergency.
Start by shutting off the water source if you can identify it safely. For burst pipes, close the main valve. For storm flooding, there's nothing to shut off, so focus on protecting yourself from contaminated water. FEMA's flood safety guidance recommends treating all floodwater as potentially contaminated with sewage and chemicals.
Next, cut power to affected rooms. If you cannot reach your breaker panel without wading through water, call an electrician before proceeding. Gas lines also demand attention. If you smell gas or suspect damage to your gas line, evacuate immediately and contact your utility provider from outside.
Finally, document the scene before moving anything. This step feels counterintuitive when water is rising, but it protects your insurance claim later. The evidence you capture now is the evidence you'll need when filing your water damage claim.
Step 2: Document Everything for Your Insurance Claim
How to file a water damage insurance claim starts with documentation you create before cleanup begins. Photos you take in the first hour carry more weight than descriptions you provide days later.
Work through the affected areas systematically. Photograph and video every room, capturing wide shots for context and close-ups for detail. Show the water line on walls, soaked carpets, standing water depth, and any damaged belongings. If you moved items to save them, photograph their original positions first.
The Insurance Information Institute's water damage claims guide notes that standard homeowners policies typically cover sudden and accidental water damage, like burst pipes, but exclude gradual damage from lack of maintenance. Flood damage from rising water requires separate flood insurance.
Step 3: What Emergency Water Extraction Services Houston Actually Do
Professional water mitigation follows a science-based sequence to remove moisture and prevent secondary damage. Emergency water extraction services Houston residents hire deploy trained technicians who assess the situation, categorize the water, and execute a drying plan using commercial-grade equipment.
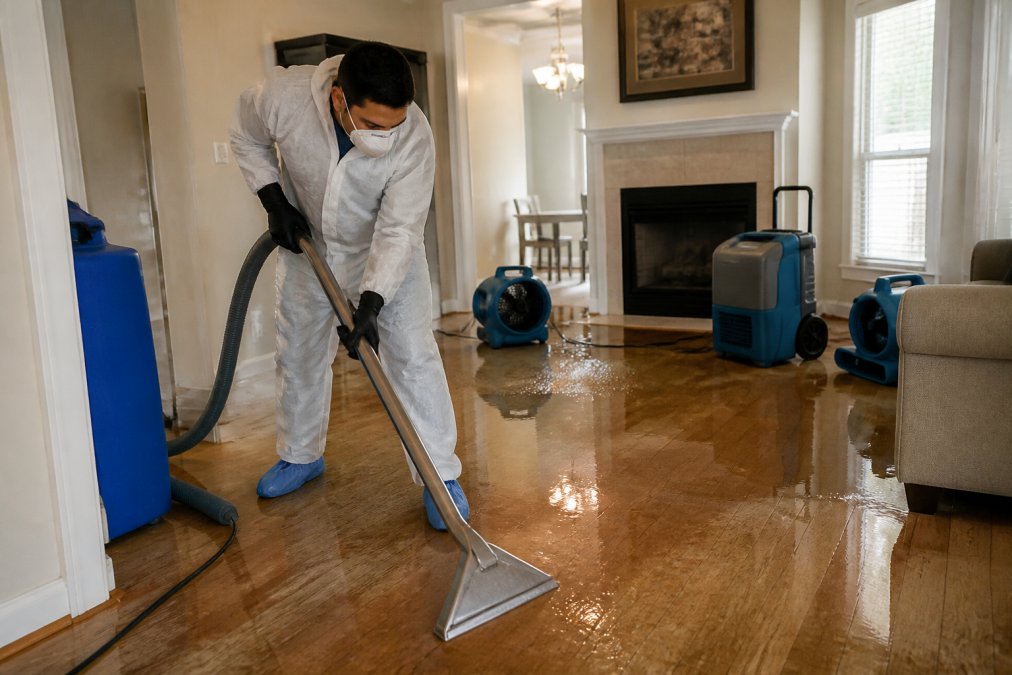
The process begins with a moisture inspection. Technicians use moisture meters and hygrometers to map water saturation, identifying hidden pockets behind walls and under flooring. Thermal imaging cameras help detect water migration paths through building materials.
Water Extraction Equipment and Techniques
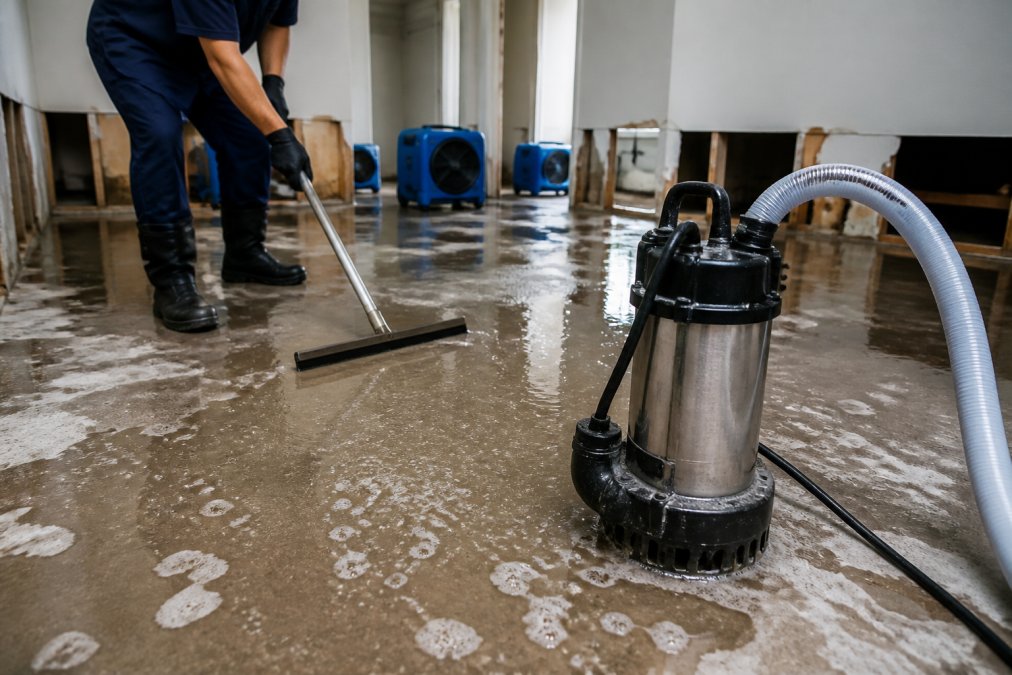
Water extraction equipment removes standing water quickly, preventing it from migrating deeper into your home's structure. Professional-grade extractors pull water from carpets, upholstery, and hard surfaces far more effectively than shop vacuums. For flooded areas, technicians use submersible pumps capable of removing thousands of gallons per hour.
The water's category determines the safety protocols involved. Clean water from a broken supply line requires different handling than category 3 water from sewage or flood sources. Contaminated water demands specialized sanitization and decontamination procedures, along with proper disposal of porous materials like carpet and drywall that cannot be effectively cleaned.
Structural Drying and Dehumidification
After visible water extraction, structural drying removes moisture trapped inside walls, subflooring, and structural beams. Technicians deploy air movers to create airflow across wet surfaces and industrial dehumidifiers to pull moisture from the air, accelerating evaporation.
Moisture mapping guides the drying process. Technicians take regular readings to track drying progress, adjusting equipment placement as different areas reach target moisture levels. This monitoring continues until materials return to their normal moisture content, typically over several days. Cutting this process short risks hidden moisture that fuels mold growth and structural decay.
The Water Damage Restoration Timeline: What to Expect
The water damage restoration timeline varies with the extent of the damage, but understanding the phases helps you plan and reduces anxiety. The real value lies in knowing what drives the timeline, and your final invoice.
Phase 1: Emergency Response (Hours 0-24)
The first 24 hours focus on emergency response: water extraction, initial moisture assessment, and beginning structural drying. A professional crew typically arrives within 2 to 4 hours of your call, using submersible pumps and truck-mounted extractors to remove standing water, often pulling hundreds of gallons per minute.
This is also when the crew establishes the category of water, clean (Category 1), gray (Category 2), or black (Category 3), which directly affects both safety protocols and cost. Category 3 water, from sewage or flooding, requires full containment, disposal of porous materials, and sanitization that can double the project's price per square foot.
Phase 2: Structural Drying and Monitoring (Days 2-5)
Days two through five involve continued drying, monitoring moisture levels, and beginning demolition of unsalvageable materials like saturated drywall and insulation. The drying process typically reaches completion within three to five days for most residential scenarios.
The drying timeline is governed by evaporation rates, not calendar days. Technicians use air movers to create targeted airflow across wet surfaces and low-grain refrigerant dehumidifiers (or desiccant dehumidifiers for cold environments) to maintain a vapor pressure differential that pulls water out of wood and drywall.
Your provider should take daily moisture readings with pin-type or non-invasive moisture meters and document them. Drying stalls when equipment is placed once and never repositioned; reputable crews move air movers every 12 to 24 hours to chase the drying front. If your provider can't show you a drying log with falling moisture content numbers, ask why.
Phase 3: Demolition and Mitigation Decisions (Days 3-7)
Not all wet materials are salvageable. Saturated drywall above the water line, wet fiberglass insulation, and carpet padding are typically removed and replaced. Hardwood flooring is a judgment call: if wet for less than 48 hours, a skilled crew can often save it with controlled drying; beyond that, cupping and delamination usually mean replacement.
This phase is where cost transparency matters most. Restoration pricing typically runs on a per-square-foot basis for drying, plus line items for extraction, demolition, and disposal. Ask for a line-item estimate before demolition begins.
Phase 4: Restoration and Rebuilding (Week 1-4+)
Restoration and rebuilding follow once materials test dry, including replacing drywall, flooring, and trim, followed by painting and final cleanup. Full restoration timelines range from one to several weeks. Your provider should give you a written schedule with milestones and regular updates.
A critical checkpoint occurs here: the final moisture verification. Before any drywall goes up, the crew should perform a final moisture scan of all affected cavities. Skipping this step risks sealing moisture behind new walls, the single most common cause of post-restoration mold claims.
What Slows Down a Restoration Timeline
Most projects that drag past two weeks are delayed by insurance adjuster approval delays, hidden moisture discovered after initial demolition, or material backorders. Accelerate the process by filing your claim within 24 hours, approving the mitigation scope immediately, and staying in direct communication with your project manager. A good restoration company coordinates directly with your adjuster.
Signs of Mold After Water Damage: When to Call for Remediation
Signs of mold after water damage can appear within 24 to 48 hours of moisture exposure. Mold growth starts in hidden areas first, behind walls, under flooring, and inside HVAC systems, where moisture lingers longest.
Visible mold appears as discoloration in shades of black, green, or white, often accompanied by a musty odor. But visual inspection alone misses the problem: mold thrives in the dark, damp spaces behind your walls. If you smell mustiness but see nothing, mold may already be colonizing hidden cavities. Professional mold remediation services use moisture detection and air sampling to locate growth you can't see.
EPA's mold remediation guidance states that mold can cause health effects including allergic reactions, asthma exacerbation, and respiratory irritation. If you or your family members experience unexplained coughing, sneezing, or breathing difficulties after water damage, mold exposure may be the cause. Professional remediation removes contaminated materials and treats affected areas to prevent recurrence.
Where Mold Hides First
Mold doesn't start on open surfaces, it starts where moisture collects and air doesn't move. The most common hidden colonization points after water damage are:
- Behind baseboards and trim where water wicked up from the floor
- Inside wall cavities below the flood line, especially if insulation stayed wet
- Under vinyl or laminate flooring where water migrated beneath the surface
- Inside HVAC ductwork near registers where humid air condensed
- In the bottom of kitchen and bathroom cabinets where water pooled unnoticed
Homeowners often smell mold but find nothing because the growth is inside a wall cavity. If you suspect hidden mold, don't cut into walls blindly. A professional will use a moisture meter to trace the wet path and a borescope to look inside cavities before opening anything.
The 48-Hour Rule and What It Means for You
Mold spores are everywhere, indoors and out. The question isn't whether spores are present; it's whether conditions allow them to germinate. Mold requires moisture, a food source (wood, drywall, paper), and temperatures between 40°F and 100°F. Your home provides all three; the only variable you can control is moisture.
If wet materials are dried within 48 hours, mold growth is unlikely to establish. After 72 hours of continuous moisture, colonization becomes probable. This is why the drying phase of water restoration isn't optional, it's your primary mold prevention strategy.
DIY Inspection Steps Before You Call a Professional
If you've had water damage and want to assess mold risk before hiring a remediation company, work through this checklist:
- Follow your nose. Musty odors are often strongest near the source. Walk the perimeter of affected rooms and note where the smell intensifies.
- Check the cold spots. Use the back of your hand to feel walls and floors. Cooler areas indicate moisture evaporation, a sign of hidden dampness.
- Look for staining and warping. Yellowish or brownish stains on drywall, bubbling paint, or buckling flooring all indicate moisture that hasn't fully dried.
- Inspect HVAC registers. Shine a flashlight into supply vents and look for dark speckling on the interior surfaces.
- Test with a moisture meter. A pinless moisture meter (available at hardware stores for $30-$60) can help you identify damp areas. Readings above 15% on drywall or 12% on wood indicate moisture that needs attention.
When Professional Remediation Is Non-Negotiable
Call a licensed mold remediation company if you find visible mold covering more than 10 square feet, mold inside HVAC ducts, mold on ceiling tiles or drywall that requires removal, or mold growth in a home with anyone who has asthma, allergies, or a compromised immune system.
Professional remediation follows a containment protocol: the affected area is sealed with plastic sheeting and negative air pressure, contaminated materials are removed in sealed bags, and the area is treated with antimicrobial agents. After remediation, the contractor should perform a post-clearing verification, visual or air sampling, to confirm the area is safe for reoccupancy.
After any water event, keep indoor humidity below 50% using your air conditioner or a dehumidifier for at least two weeks. This gives residual moisture in building materials a chance to equalize without creating conditions for mold, a small step that can save you thousands in remediation later.
Common Mistakes to Avoid During Cleanup
Many homeowners inadvertently worsen water damage by acting on well-intentioned but misguided instincts, extending drying times and increasing restoration costs.
Turning on HVAC systems too early. Running your air conditioner or furnace circulates moisture-laden air throughout the house, spreading humidity to unaffected areas. Wait until professionals assess the situation.
Using regular fans instead of professional drying equipment. Household fans move air but lack the power to dry saturated building materials. They can even push moisture deeper into porous surfaces.
Removing carpet too late. Water-soaked carpet and padding act as reservoirs, keeping moisture in contact with subflooring. Extraction within hours prevents wicking damage that ruins subflooring and requires replacement.
Throwing away items prematurely. Your insurance adjuster needs to see damaged belongings before disposal. Photograph everything first, and ask your restoration team what's salvageable before discarding.
Why Choose Disaster Services for Restoration
Water damage restoration requires more than equipment; it requires experience, rapid response, and a team that handles the entire process from start to finish. Disaster Services provides 24/7 emergency response throughout the Greater Houston area, dispatching licensed and insured technicians when you need them most.
What separates Disaster Services from other providers is the complete restoration approach. We handle emergency water extraction, structural drying, mold remediation, and rebuilding under one roof. Our locally owned and family operated team manages your project from initial inspection through final restoration.
Disaster Services provides comprehensive insurance claims assistance, documenting damage, communicating with adjusters, and ensuring your claim reflects the full scope of necessary restoration. Our free visual inspection gives you a clear picture of the damage and the path forward.
When water damage strikes your home, you need a partner who responds immediately and stays through completion. Contact Disaster Services today for emergency water extraction and restoration you can trust.
Frequently Asked Questions
How quickly can emergency water extraction services in Houston respond?
Reputable restoration companies in Houston offer 24/7 emergency dispatch and aim to arrive on site within 2 to 4 hours of your call. Rapid response is critical because mold can begin growing within 24 to 48 hours of water exposure. When you call, ask for their guaranteed response time and confirm they have crews available now. A local company like Disaster Services can often reach you faster than a national chain because their teams are already stationed throughout the Greater Houston area.
Can I DIY water damage restoration instead of hiring a professional?
You can handle minor, clean water spills if you act within 24 hours and the affected area is small. However, DIY methods using household fans and shop vacuums rarely remove enough moisture from walls, subfloors, and insulation. Professional water extraction services use industrial-grade equipment like air movers, dehumidifiers, and moisture meters to dry structures properly. Attempting DIY restoration on significant flooding often leads to hidden mold growth, structural damage, and denied insurance claims. If water has soaked drywall or carpet padding, call a certified restoration company.
How do I document water damage for my insurance claim?
Start documenting before any cleanup begins. Take clear photos and videos of the water source, affected rooms, damaged belongings, and the water level. Record the time you discovered the damage. Keep samples of damaged materials like carpet or drywall if your adjuster requests them. Save all receipts for emergency purchases like fans or temporary lodging. Contact your insurance company immediately to file a claim and ask about coverage for water extraction services. A restoration company can also document the damage with moisture mapping and detailed reports to strengthen your claim.
What are the first signs of mold after water damage?
The first signs of mold after water damage are often visual or olfactory. You may notice a musty, earthy smell within 24 to 48 hours. Look for discoloration on walls, ceilings, or baseboards, especially dark green, black, or white spots. Warping or bubbling paint can indicate moisture behind surfaces. Health symptoms like sneezing, coughing, or headaches that worsen when you are at home also point to mold growth. If you see or smell mold, do not disturb it. Professional mold remediation is necessary to remove contaminated materials and treat the affected areas safely.